
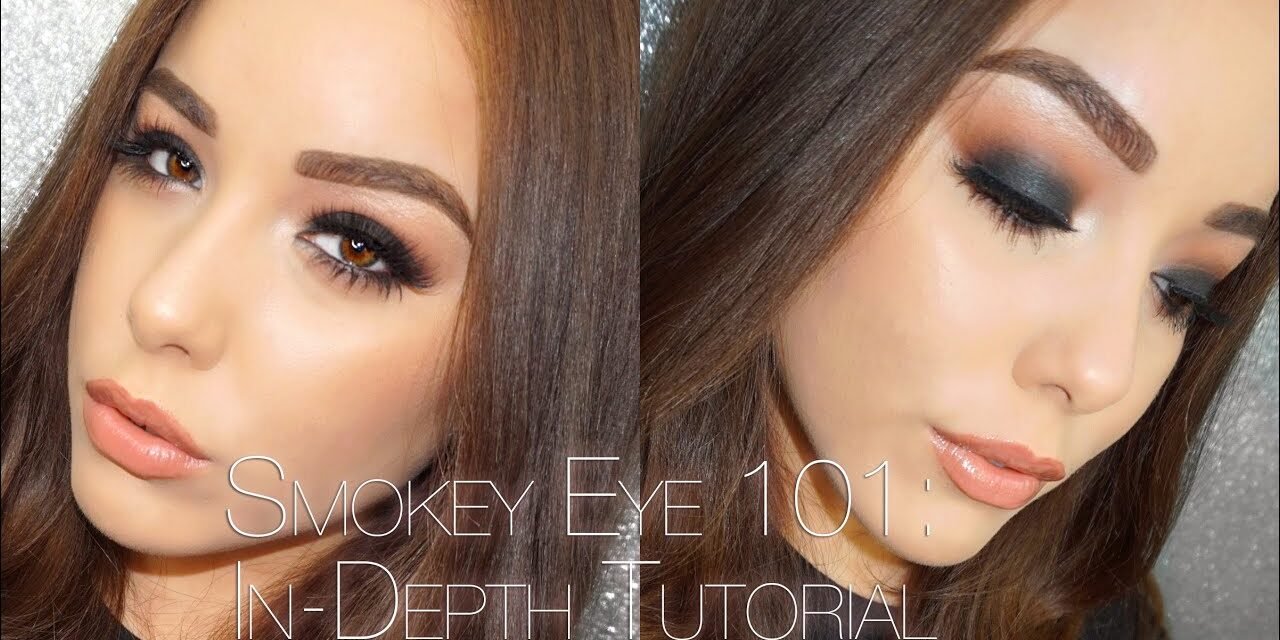


The smokey eye is one of the most iconic makeup looks in history. It’s sultry, versatile, and perfect for both day and night. Yet, many beginners shy away from trying it because it looks complicated. The truth is, with the right technique and a little practice, anyone can master the smokey eye. In this tutorial, we’ll break it down step-by-step so you can confidently create this timeless look — without feeling overwhelmed.
Why the Smokey Eye Is a Classic
The smokey eye has been a makeup staple for decades because it works for almost any occasion. It enhances your eyes, adds depth, and creates a touch of mystery. The best part? You can adjust the intensity — go soft and subtle for daytime or bold and dramatic for evening events.
Step 1: Gather Your Tools and Products
Before you start, make sure you have the following:
-
Eye primer – to keep your eyeshadow from creasing or fading
-
Neutral transition shade – a medium-toned eyeshadow (taupe, light brown)
-
Dark shade – black, charcoal, dark brown, or deep plum for the smokey effect
-
Highlight shade – a light shimmer or matte shade for the brow bone and inner corner
-
Eyeliner – black or dark brown pencil or gel liner
-
Blending brush – fluffy for softening edges
-
Flat shader brush – for packing on color
-
Mascara – for a dramatic finish
Step 2: Prep Your Eyes
A flawless smokey eye starts with a smooth base. Apply an eye primer over your lids to ensure long-lasting color. If you don’t have primer, use a concealer and set it lightly with translucent powder. This will help your shadows blend seamlessly.
Step 3: Start with a Transition Shade
Using a fluffy blending brush, sweep your neutral transition shade across your crease. This will make blending darker colors easier and prevent harsh lines. The key is to keep your hand light and blend in windshield-wiper motions.
Step 4: Apply the Dark Base Color
To create that smokey effect, start by applying your dark eyeshadow shade to the outer corner of your eyelid. Use a flat shader brush to pat the color onto the lid, concentrating most of the pigment near the lash line and fading it upward.
For a more intense look, you can first apply a dark eyeliner across your entire lid and smudge it before layering the eyeshadow. This gives depth and richness to your smokey eye.
Step 5: Blend, Blend, Blend
Blending is the most important step in a smokey eye. Use your clean blending brush to soften the edges of the dark shadow into your transition color. Move in small circular motions and avoid dragging the color too high toward the brow bone. The goal is a seamless gradient from dark to light.
Step 6: Smoke Out the Lower Lash Line
A true smokey eye extends below the eyes. Take a small brush and apply your dark shadow along the lower lash line, starting from the outer corner and moving inward. Then, soften it with your transition shade for a hazy effect. This step makes your eyes look bigger and more balanced.
Step 7: Highlight Key Areas
Apply your highlight shade to the inner corners of your eyes to brighten them up. You can also add a bit under the brow bone for lift. This small detail keeps your smokey eye from looking too heavy.
Step 8: Line Your Eyes
Use a black or dark brown eyeliner along your upper lash line, smudging it slightly for a softer finish. For extra drama, line your waterline as well. A gel or pencil liner works best for this step.
Step 9: Add Mascara (or Lashes)
Finish with a few coats of volumizing mascara to make your lashes stand out. If you want extra glam, add false lashes for a bold, red-carpet-ready look.
Extra Tips for Beginners
-
Start with browns before trying black — brown smokey eyes are softer and more forgiving.
-
Clean up mistakes with a makeup wipe or concealer for sharp edges.
-
Balance your face makeup — pair bold eyes with neutral lips for a harmonious look.
-
Practice makes perfect — the more you try, the faster you’ll blend like a pro.
Final Thoughts
The smokey eye might look intimidating, but it’s all about layering and blending. Once you understand the technique, you can play with different colors — think deep greens, purples, or even metallics — to make the look your own. Whether you’re heading to a party, a date night, or just want to feel a little glamorous, mastering the smokey eye will give you a timeless, confidence-boosting skill in your makeup arsenal.


